
티스토리 뷰
1. 자격증명 공급자 추가
1-1. 자격증명 공급자 메뉴의 [공급자 추가] 버튼을 클릭한다

1-2. 자격증명 공급자 URL 및 대상 등록
- For the provider URL: Use
https://token.actions.githubusercontent.com - For the "Audience": Use
sts.amazonaws.comif you are using the official action.

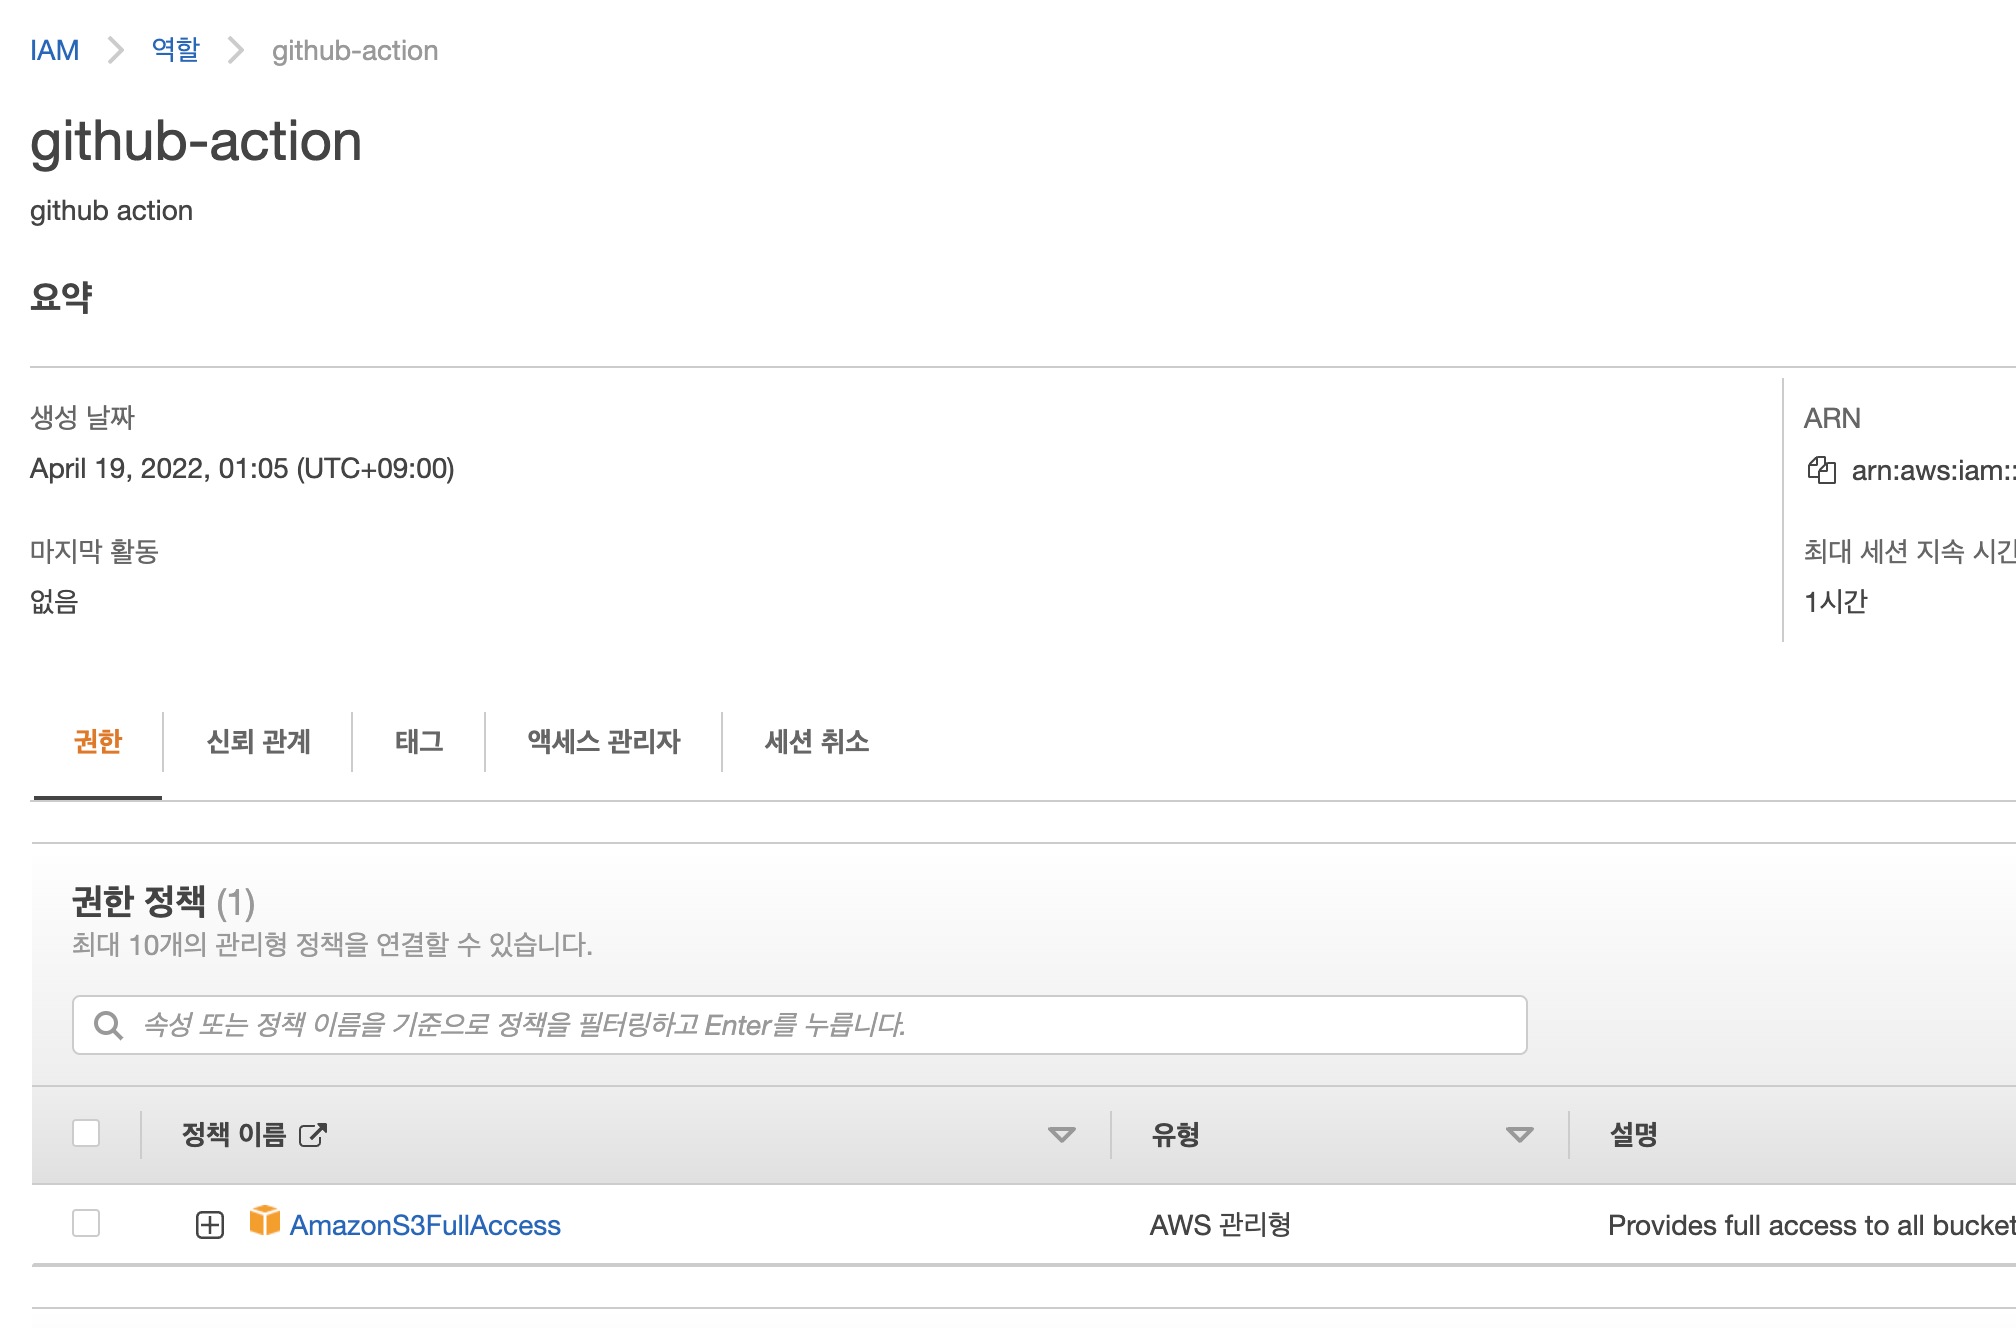
2. Role 생성
2-1. 정책 생성 및 추가
2-2. 신뢰관계 등록
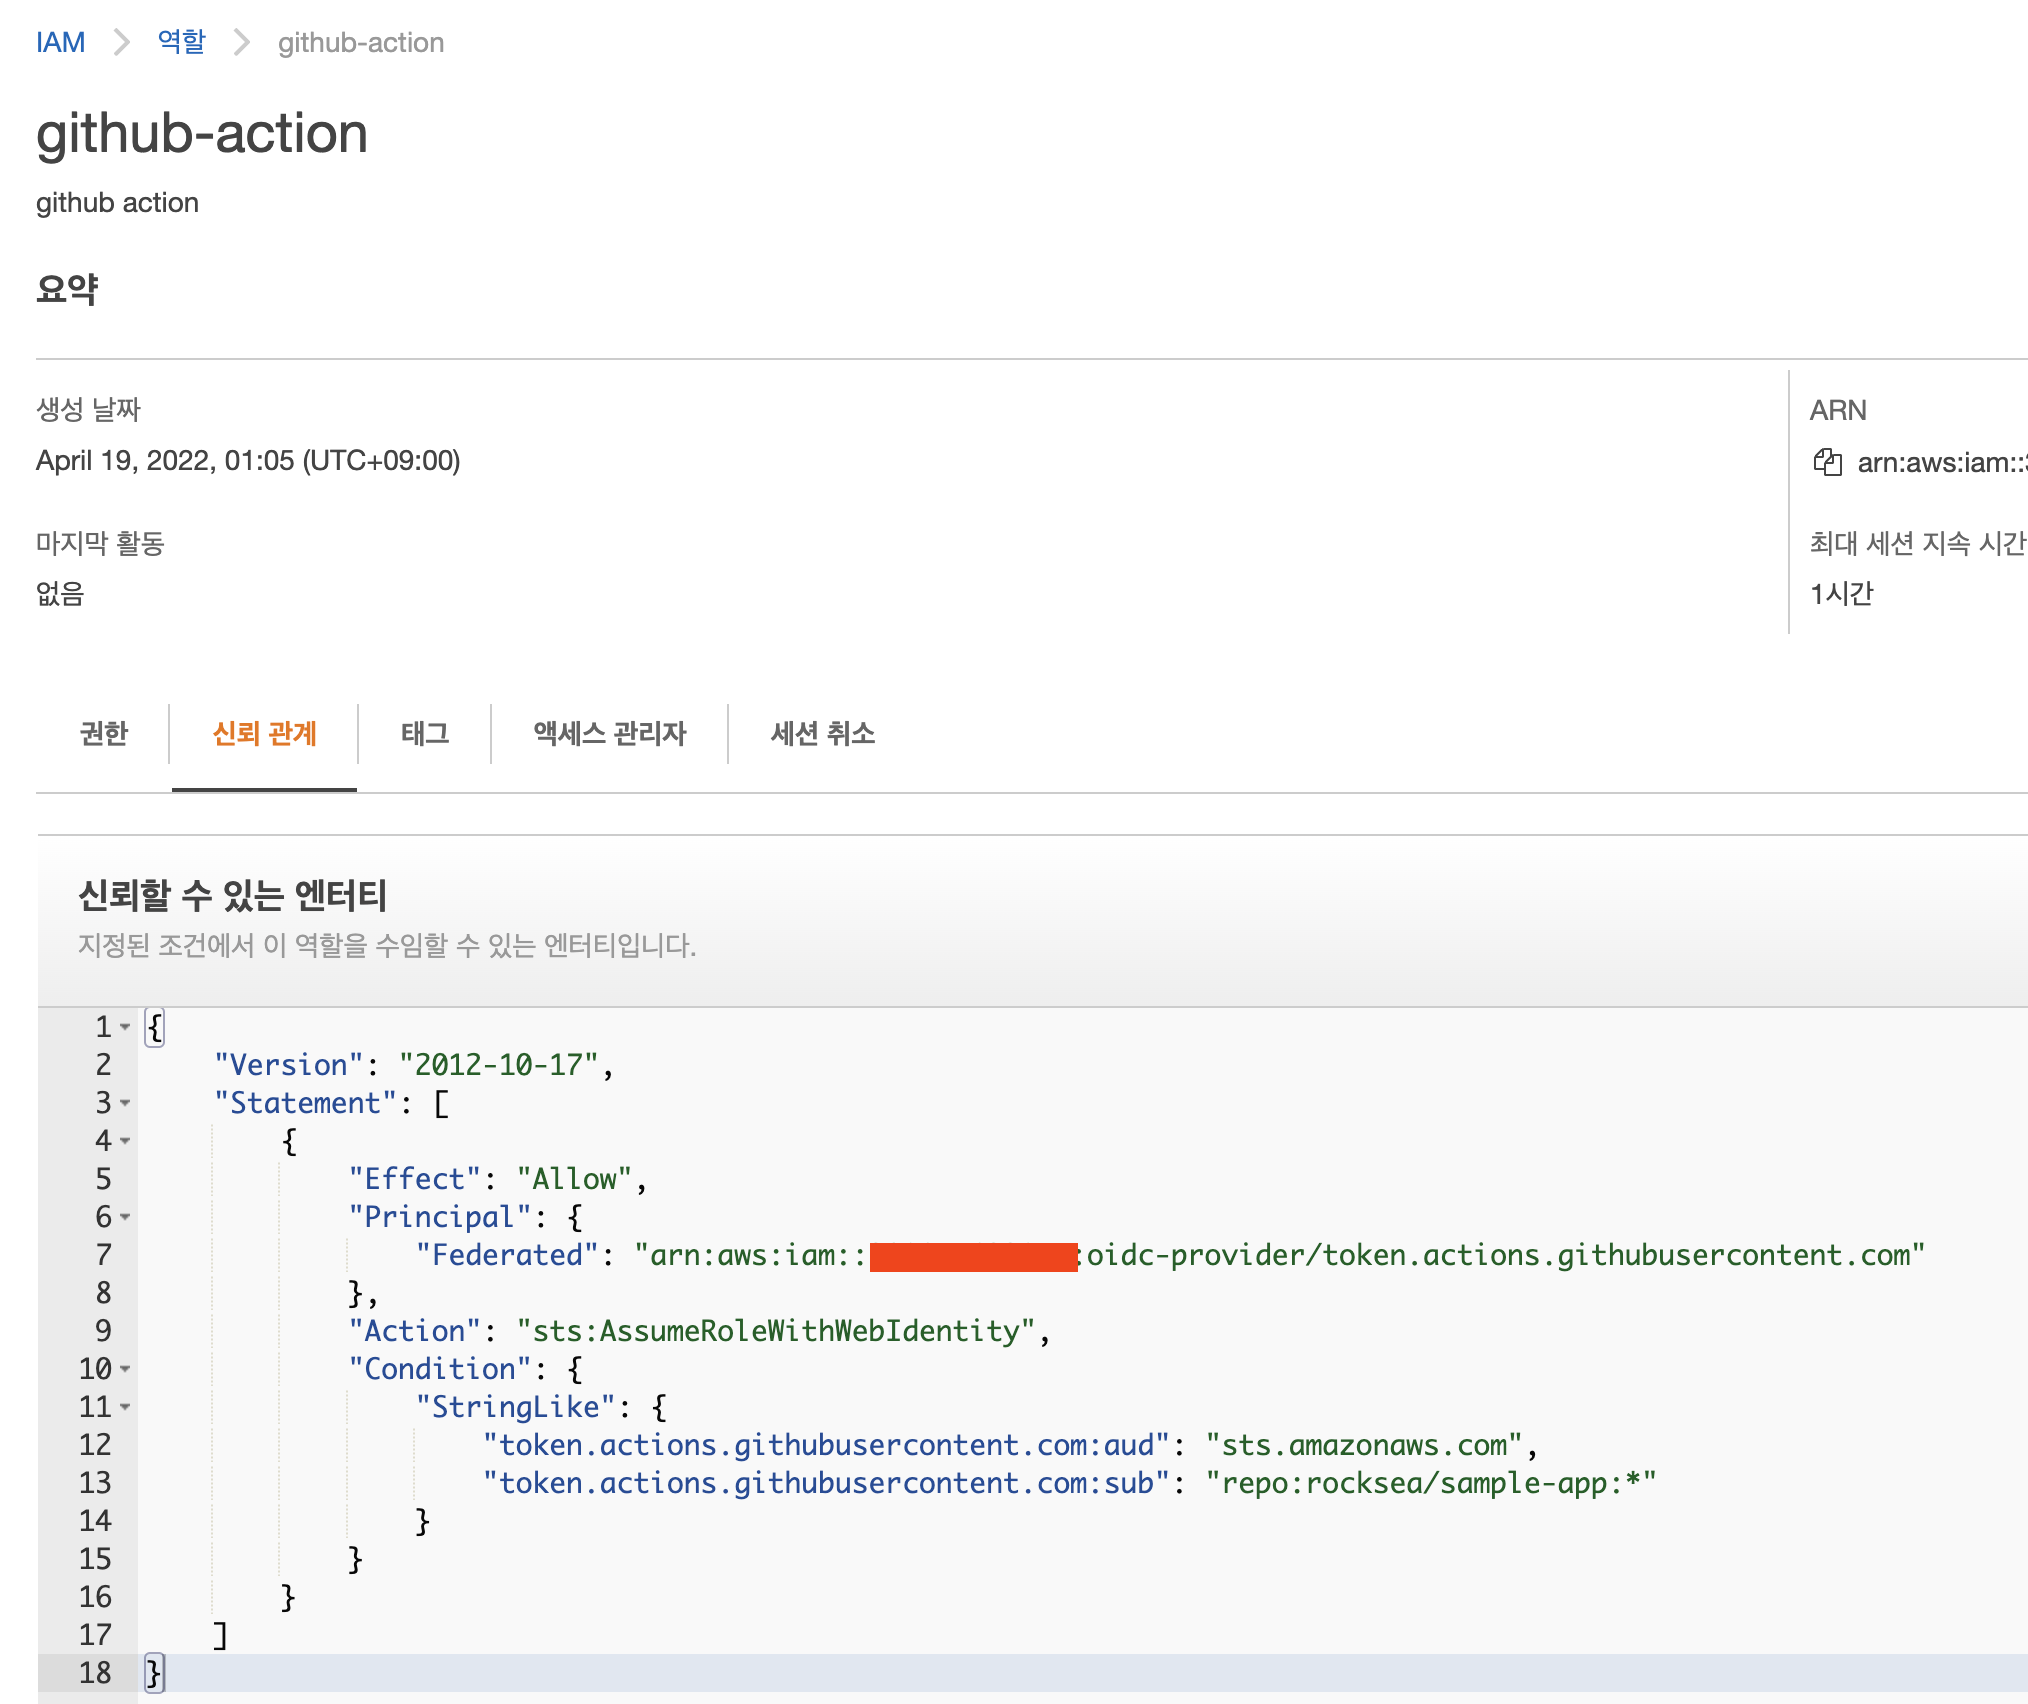
{
    "Version": "2012-10-17",
    "Statement": [
        {
            "Effect": "Allow",
            "Principal": {
                "Federated": "arn:aws:iam::xxxxxxxxx:oidc-provider/token.actions.githubusercontent.com"
            },
            "Action": "sts:AssumeRoleWithWebIdentity",
            "Condition": {
                "StringLike": {
                    "token.actions.githubusercontent.com:aud": "sts.amazonaws.com",
                    "token.actions.githubusercontent.com:sub": "repo:rocksea/sample-app:*"
                }
            }
        }
    ]
}
3. Github Action 작성
3-1. .github/workflows/pr.yml 에 작성 후 push
name: PR workflow
on:
pull_request:
branches: [ main ]
env:
BUCKET_NAME : "rocksea-apps"
AWS_REGION : "ap-northeast-2"
REPOSITORY_NAME: ${{ github.event.repository.name }}
BRANCH_NAME: ${{ github.head_ref || github.ref_name }}
COMMIT_ID: $${{ github.sha }}
PR_NUMBER: ${{ github.event.number}}
permissions:
id-token: write
contents: read
jobs:
S3PackageUpload:
runs-on: ubuntu-latest
steps:
- name: Git clone the repository
uses: actions/checkout@v3
- name: configure aws credentials
uses: aws-actions/configure-aws-credentials@v1
with:
role-to-assume: arn:aws:iam::xxxxxxxx:role/github-action
role-session-name: samplerolesession
aws-region: ${{ env.AWS_REGION }}
- name: Check envs
run: |
echo REPOSITORY_NAME: ${REPOSITORY_NAME}
echo BRANCH_NAME: ${BRANCH_NAME}
echo COMMIT_ID: ${COMMIT_ID}
echo PR_NUMBER: ${PR_NUMBER}
- name: create data.json for meta
run: |
echo '{' > data.json
echo ' "repository": "'$REPOSITORY_NAME$'",' >> data.json
echo ' "branch": "'$BRANCH_NAME'",' >> data.json
echo ' "commitId": "'$COMMIT_ID'",' >> data.json
echo ' "prId": "'$PR_NUMBER'"' >> data.json
echo '}' >> data.json
- name: check meta from data.json
run: |
cat data.json
- name: check meta from data.json
run: |
REPOSITORY_FROM_JSON=$(jq .repository ./data.json)
BRANCH_FROM_JSON=$(jq .branch ./data.json)
COMMIT_ID_FROM_JSON=$(jq .commitId ./data.json)
PR_ID_FROM_JSON=$(jq .prId ./data.json)
echo ${REPOSITORY_FROM_JSON}
echo ${BRANCH_FROM_JSON}
- name: Make zip file
run: |
zip -r ./pr.zip ./
- name: Copy *.zip to s3
run: |
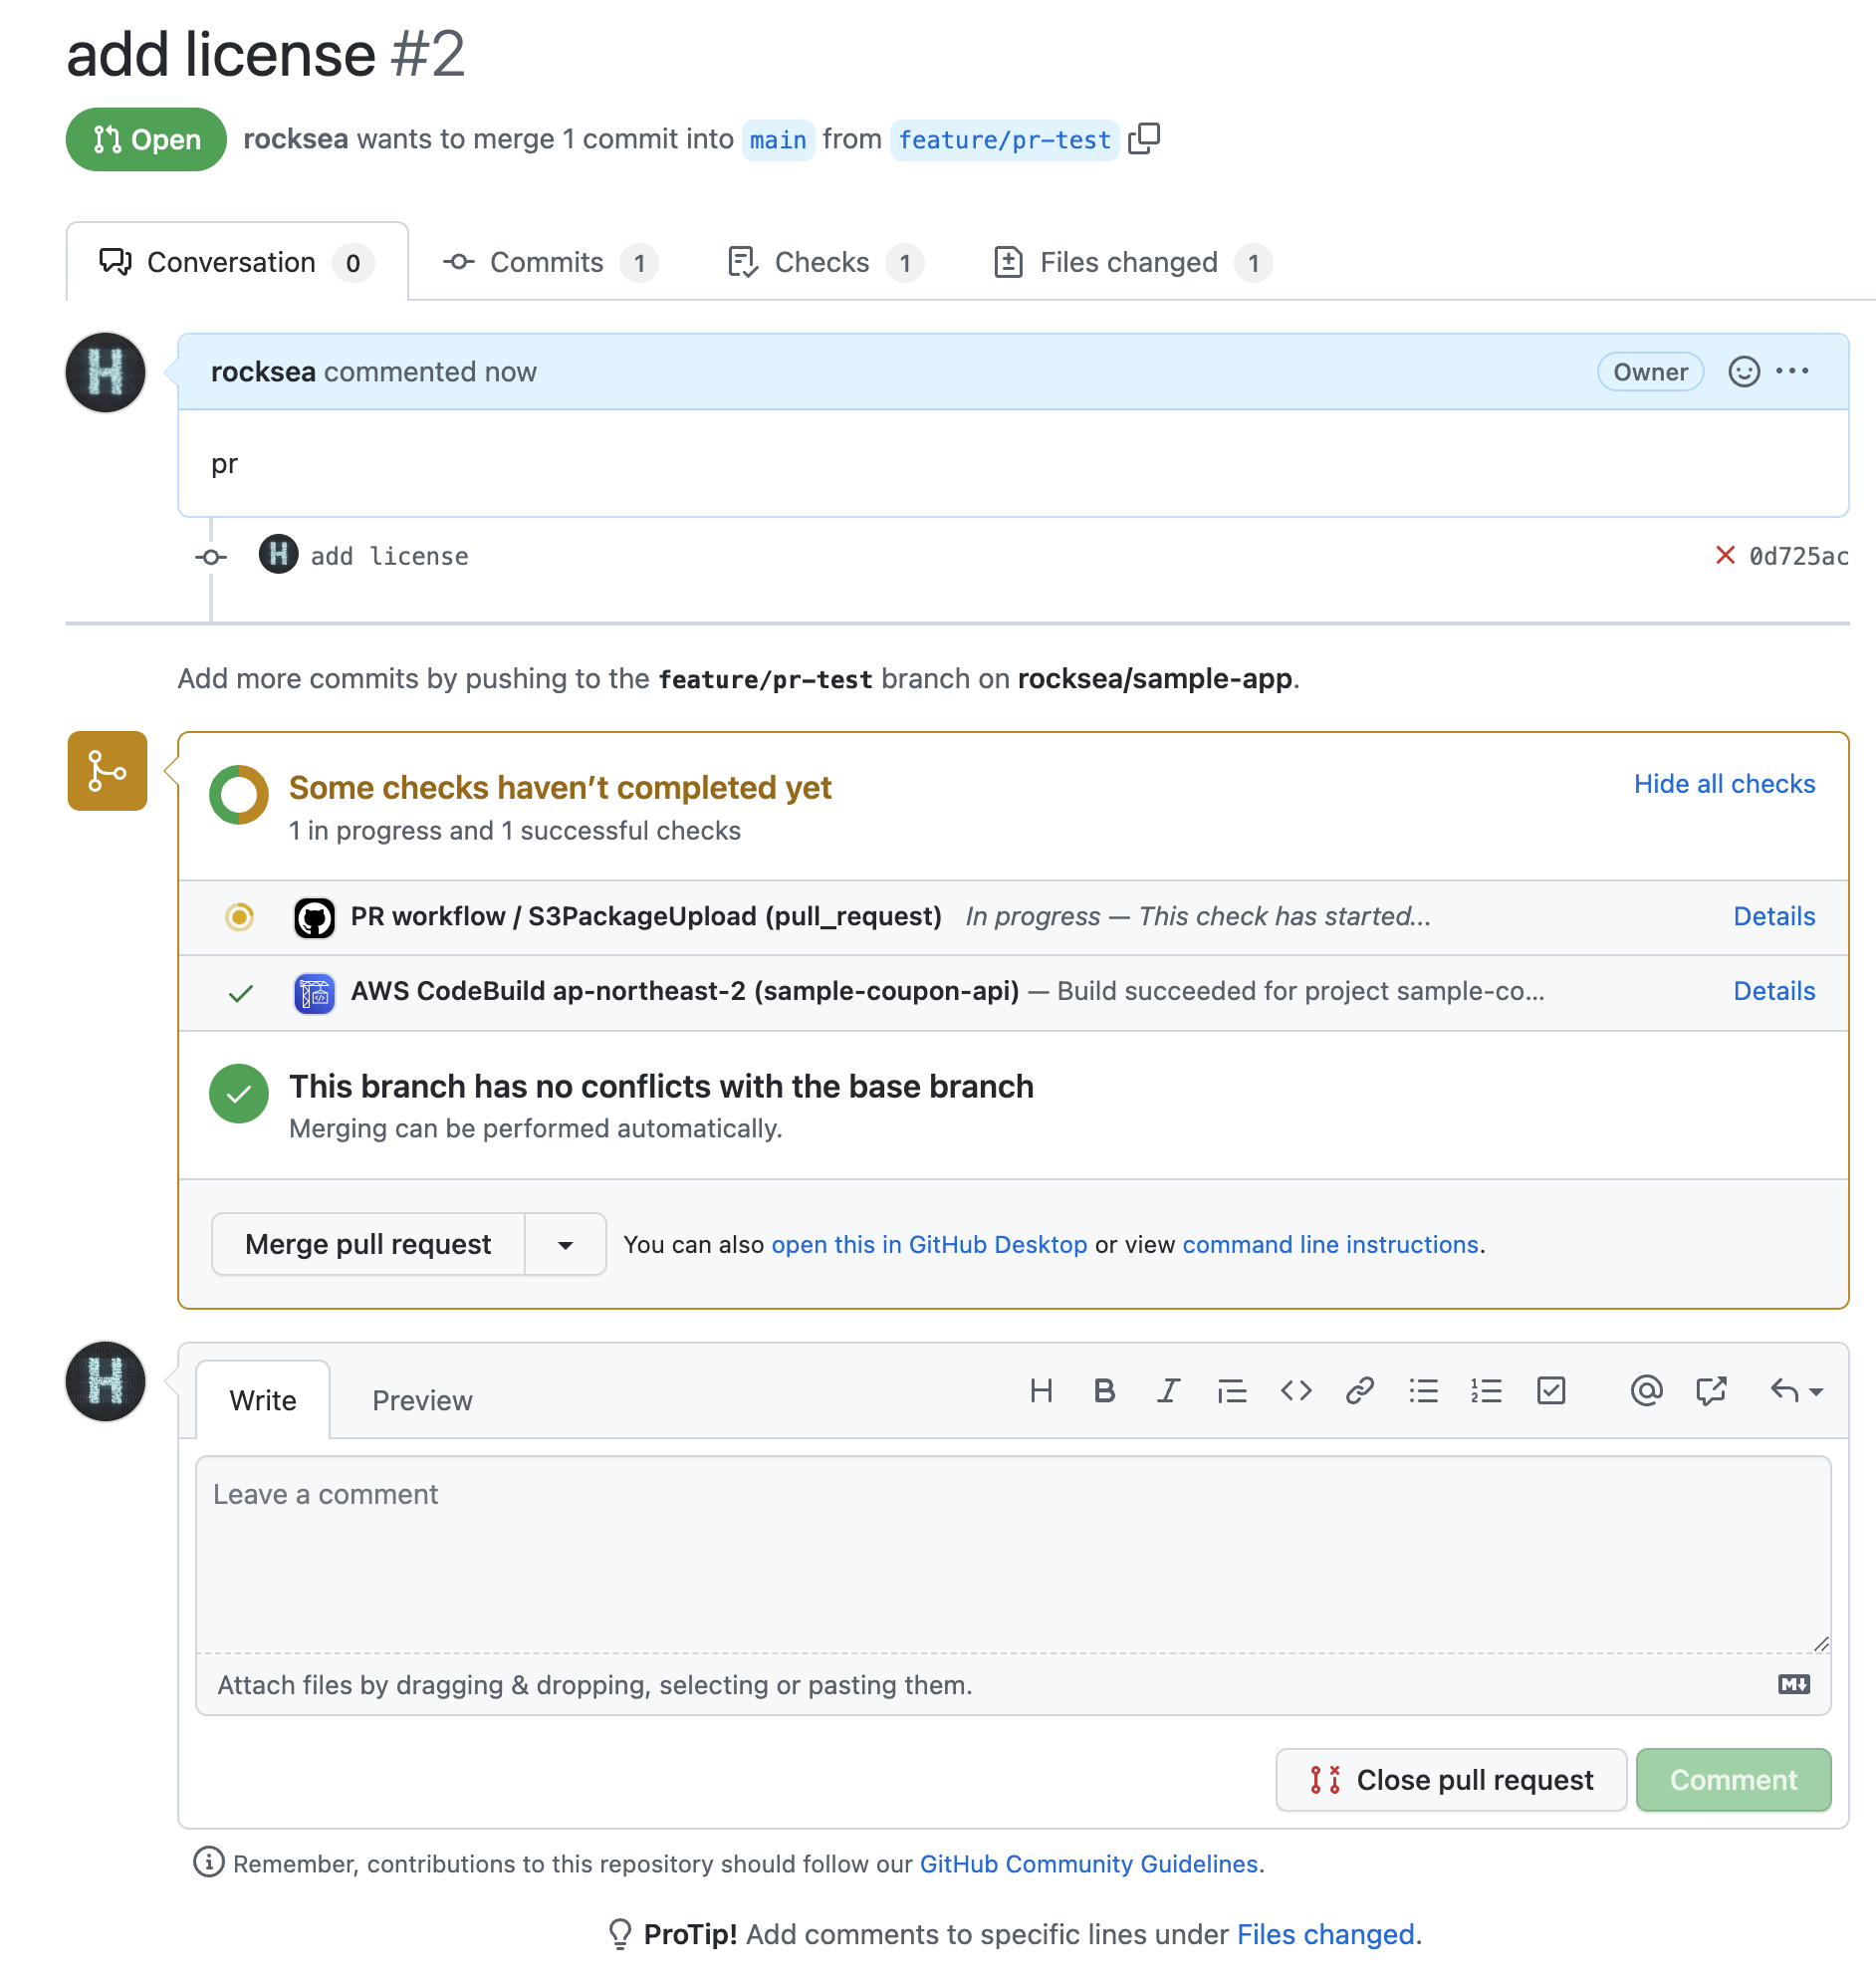
aws s3 cp ./pr.zip s3://${{ env.BUCKET_NAME }}/3-2. Pull Request 생성
PR Trigger에 의해 Github Action 실행 중.
S3 Upload 완료
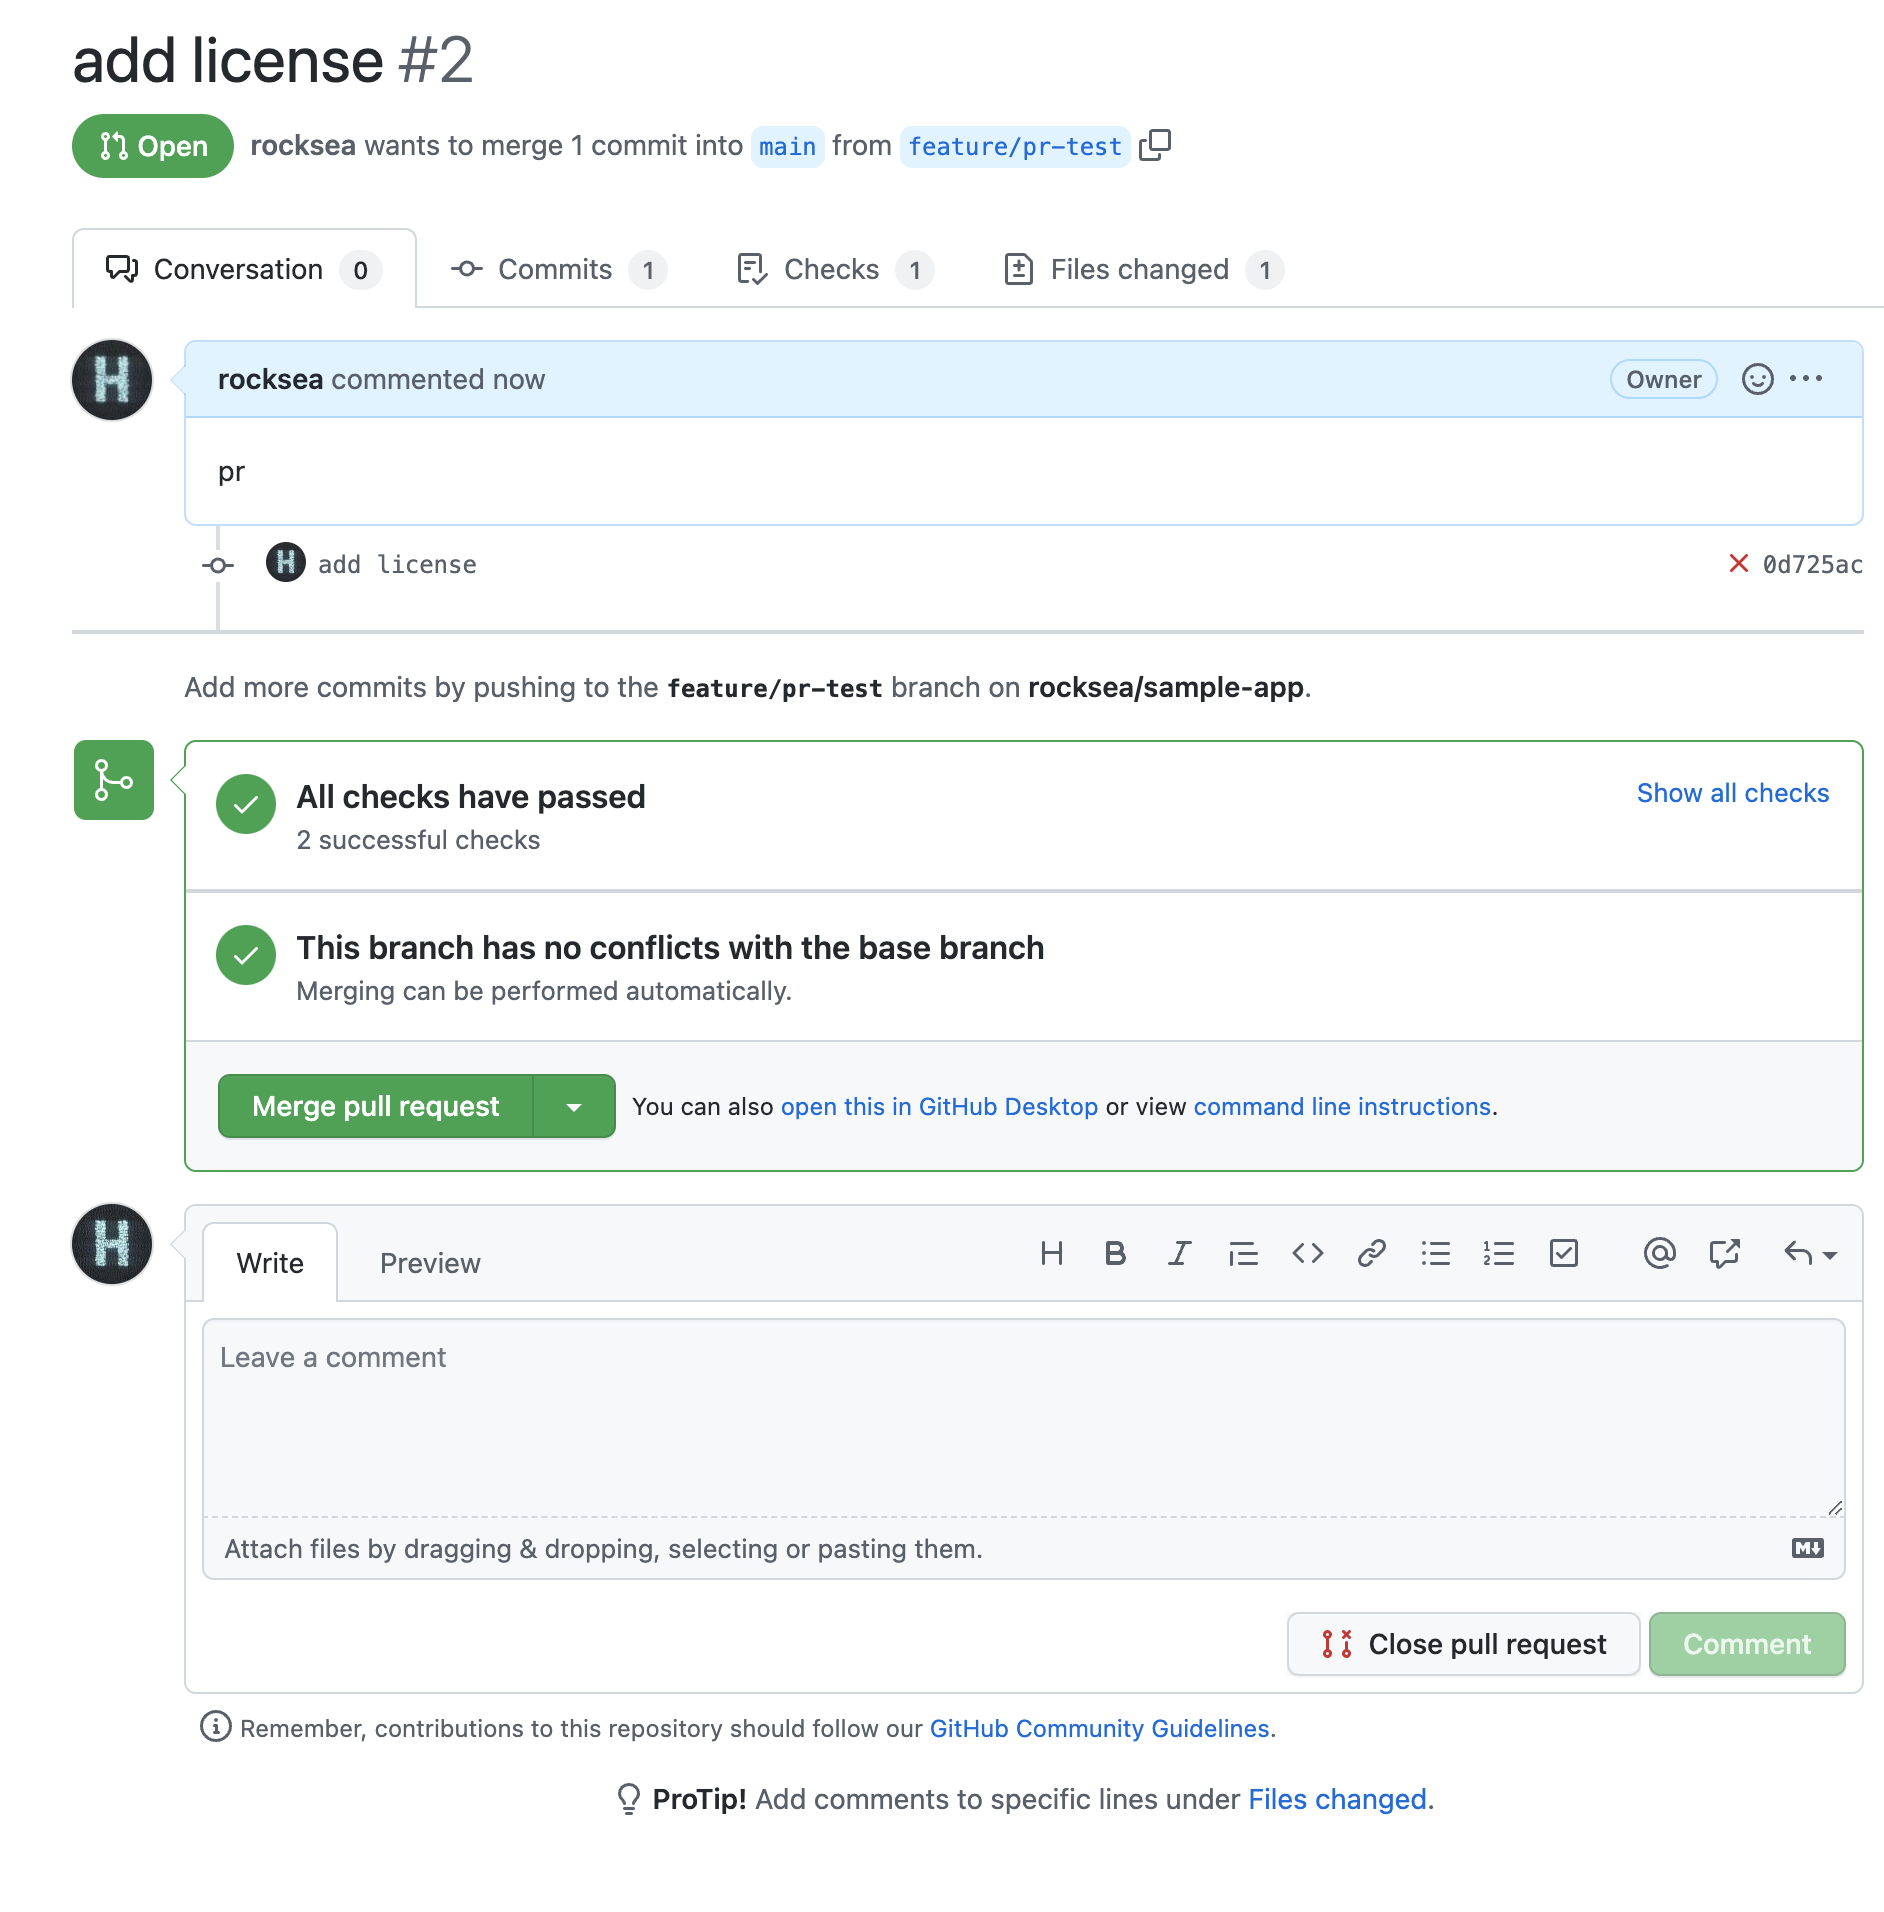
S3 Upload 확인

Reference
'Developer' 카테고리의 다른 글
| Component Tests with Spring Application (0) | 2022.08.11 |
|---|---|
| Kubernetes Liveness & Readiness Probe with Spring boot (0) | 2022.07.26 |
| How to install Argocd (0) | 2022.04.25 |
| [EKS] How to deploy an application with Kubernetes (0) | 2021.11.30 |
| 아마존웹서비시즈코리아 Inverview 후기 (8) | 2021.10.01 |
댓글
공지사항
최근에 올라온 글
최근에 달린 댓글
- Total
- Today
- Yesterday
TAG
- maven
- 조동사
- AWS
- 비지니스 영어
- k8s
- PostgreSQL
- 영문법
- it
- mongoDB
- memcached
- nodejs
- JBOSS
- 해외여행
- 스페인 여행
- Python
- NGINX
- 대명사 구문
- hdfs
- ubuntu
- redis
- 도덕경
- 여행
- Python Django
- 비교구문
- 영작
- 다낭
- hadoop
- Business English
- 가정법
- 베트남
| 일 | 월 | 화 | 수 | 목 | 금 | 토 |
|---|---|---|---|---|---|---|
| 1 | ||||||
| 2 | 3 | 4 | 5 | 6 | 7 | 8 |
| 9 | 10 | 11 | 12 | 13 | 14 | 15 |
| 16 | 17 | 18 | 19 | 20 | 21 | 22 |
| 23 | 24 | 25 | 26 | 27 | 28 | 29 |
| 30 | 31 |
글 보관함